
Introduction to printmaking workshop notes
Thank you for attending one of my printmaking workshops. As a reminder here is the process we used as well as my materials and supplier details.
Step 1
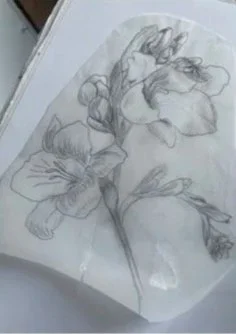
Decide on what you would like to print and using tracing paper do an accurate tracing in pencil, ideally using a 2B or HB.
Flip the tracing onto your Lino block. Secure in place with masking tape and rub the back making sure not to move the tracing.
Remove the tracing paper and go over your pencil lines in biro or a permanent marker so you have a clear image on you block. Remember that your image will print in reverse!
Step 2
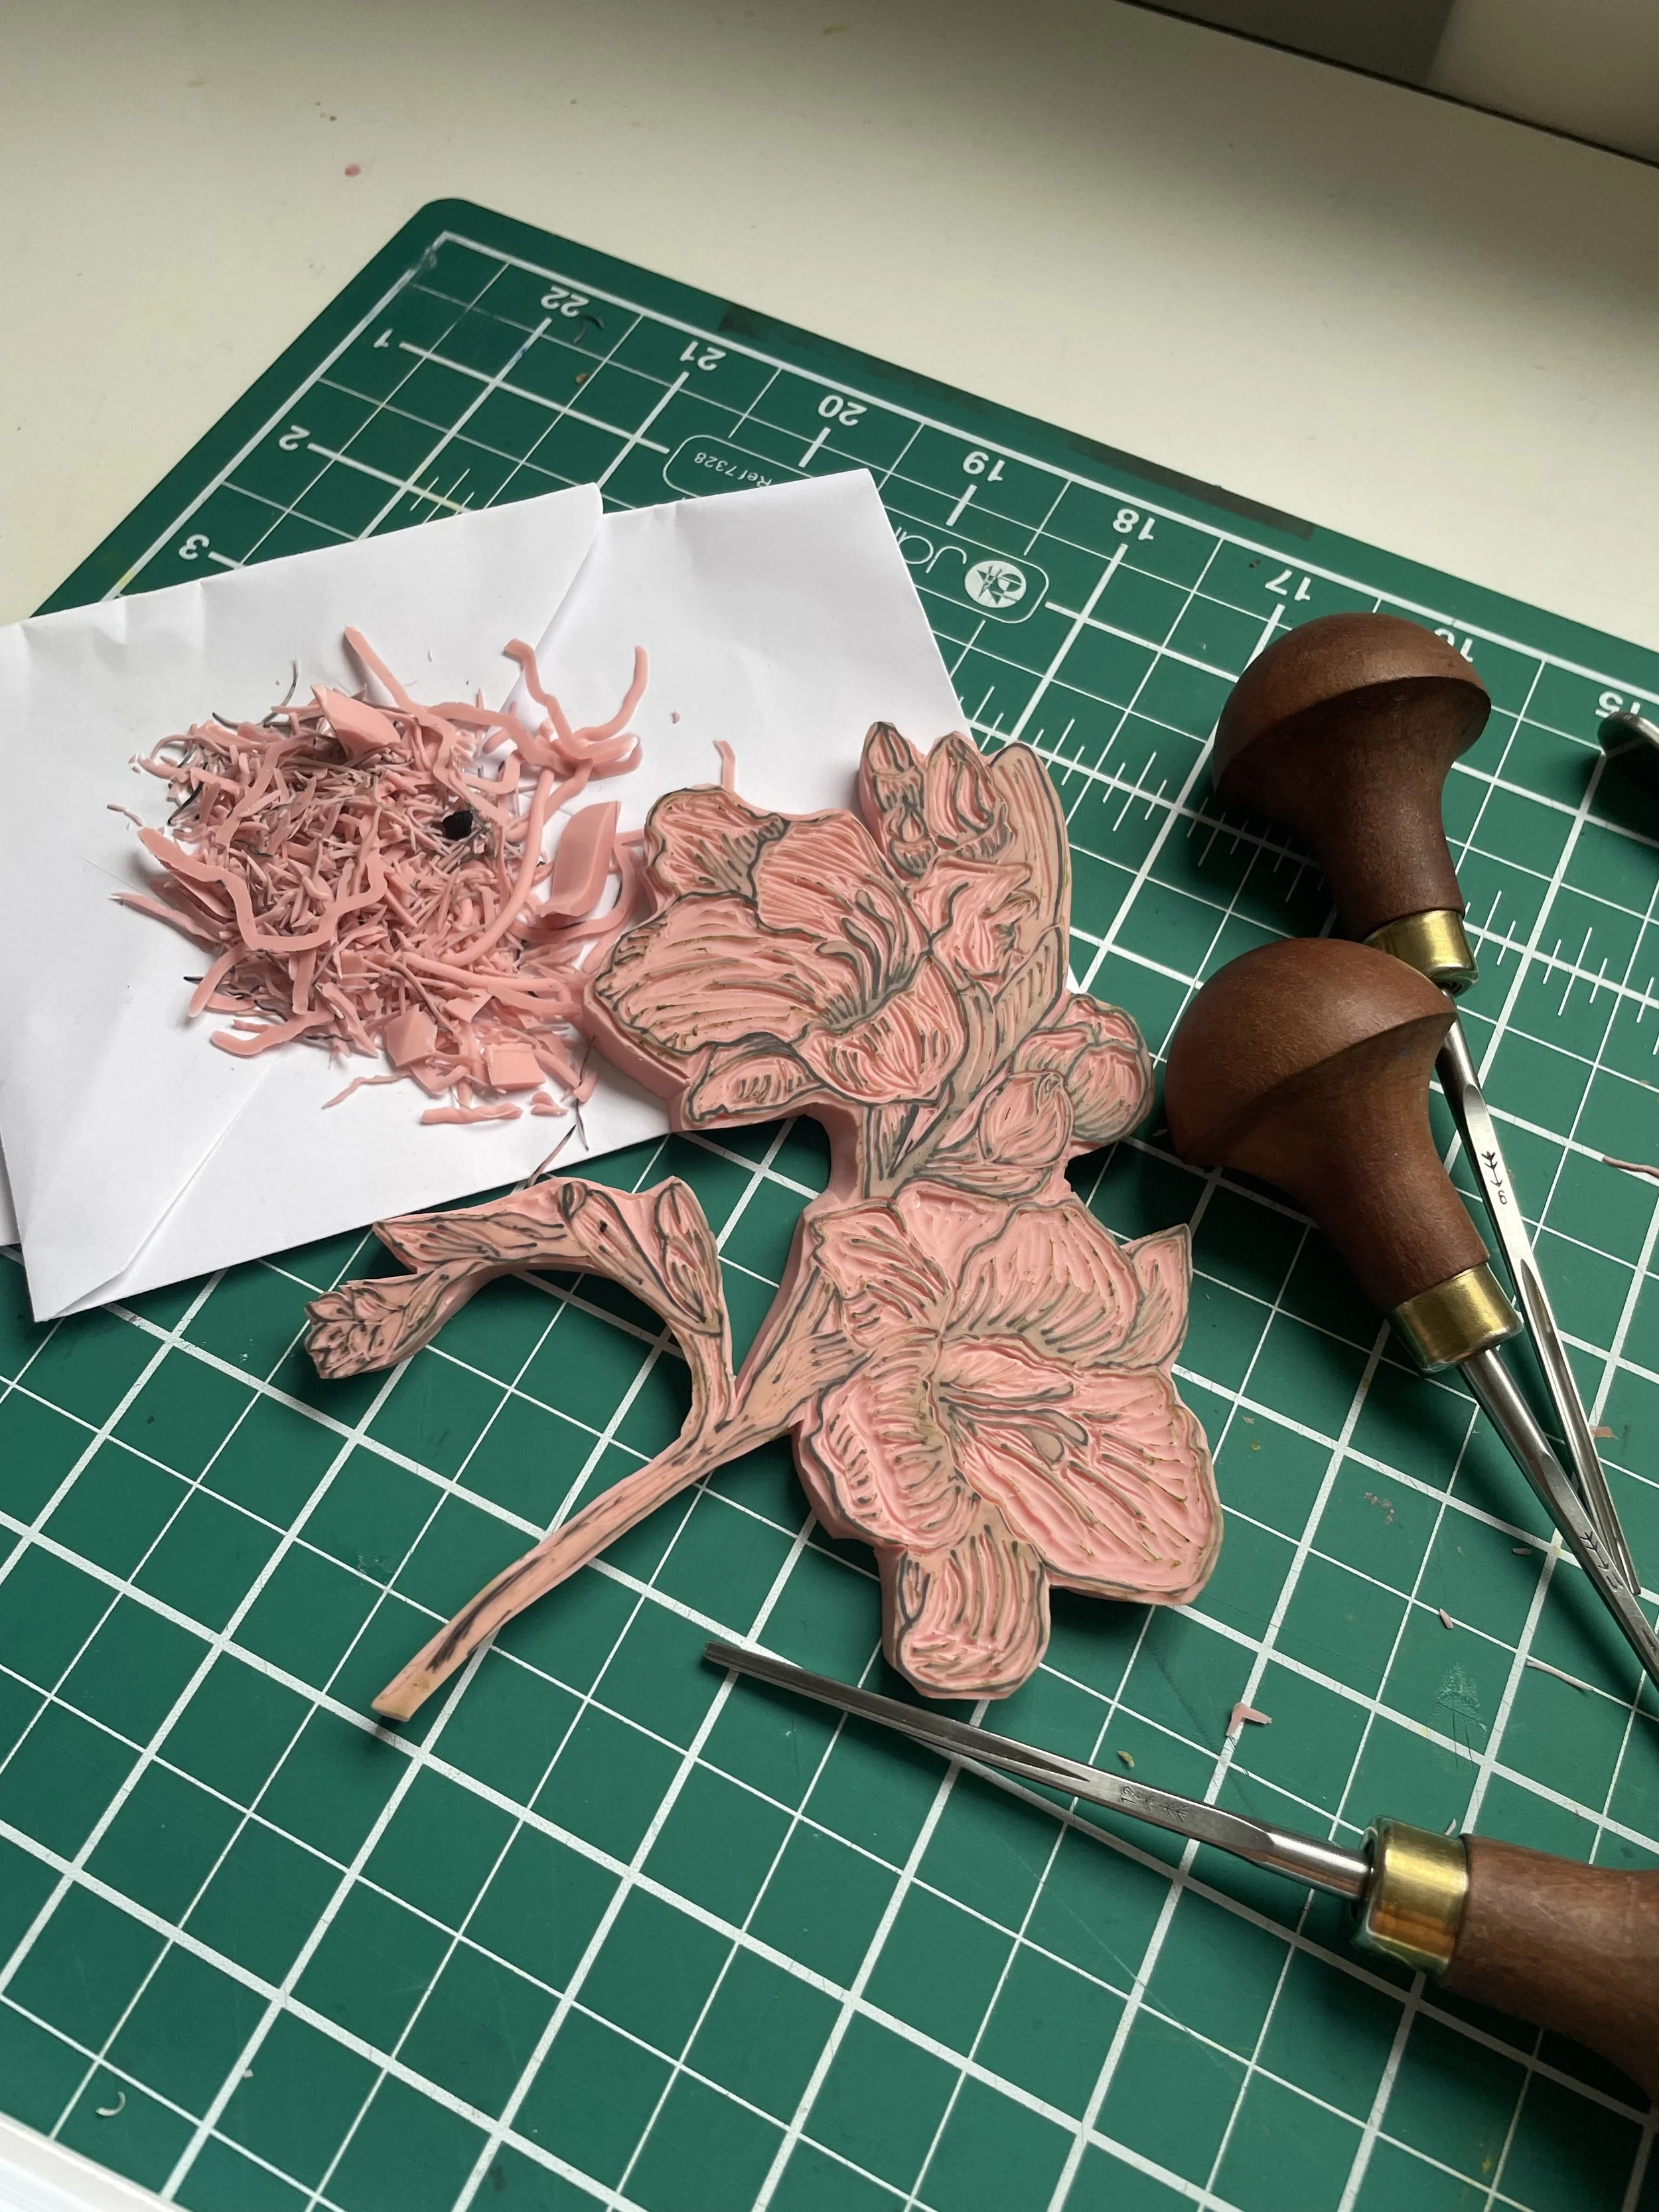
Now you can begin carving your block. Do remember what will print is the areas you have not removed!
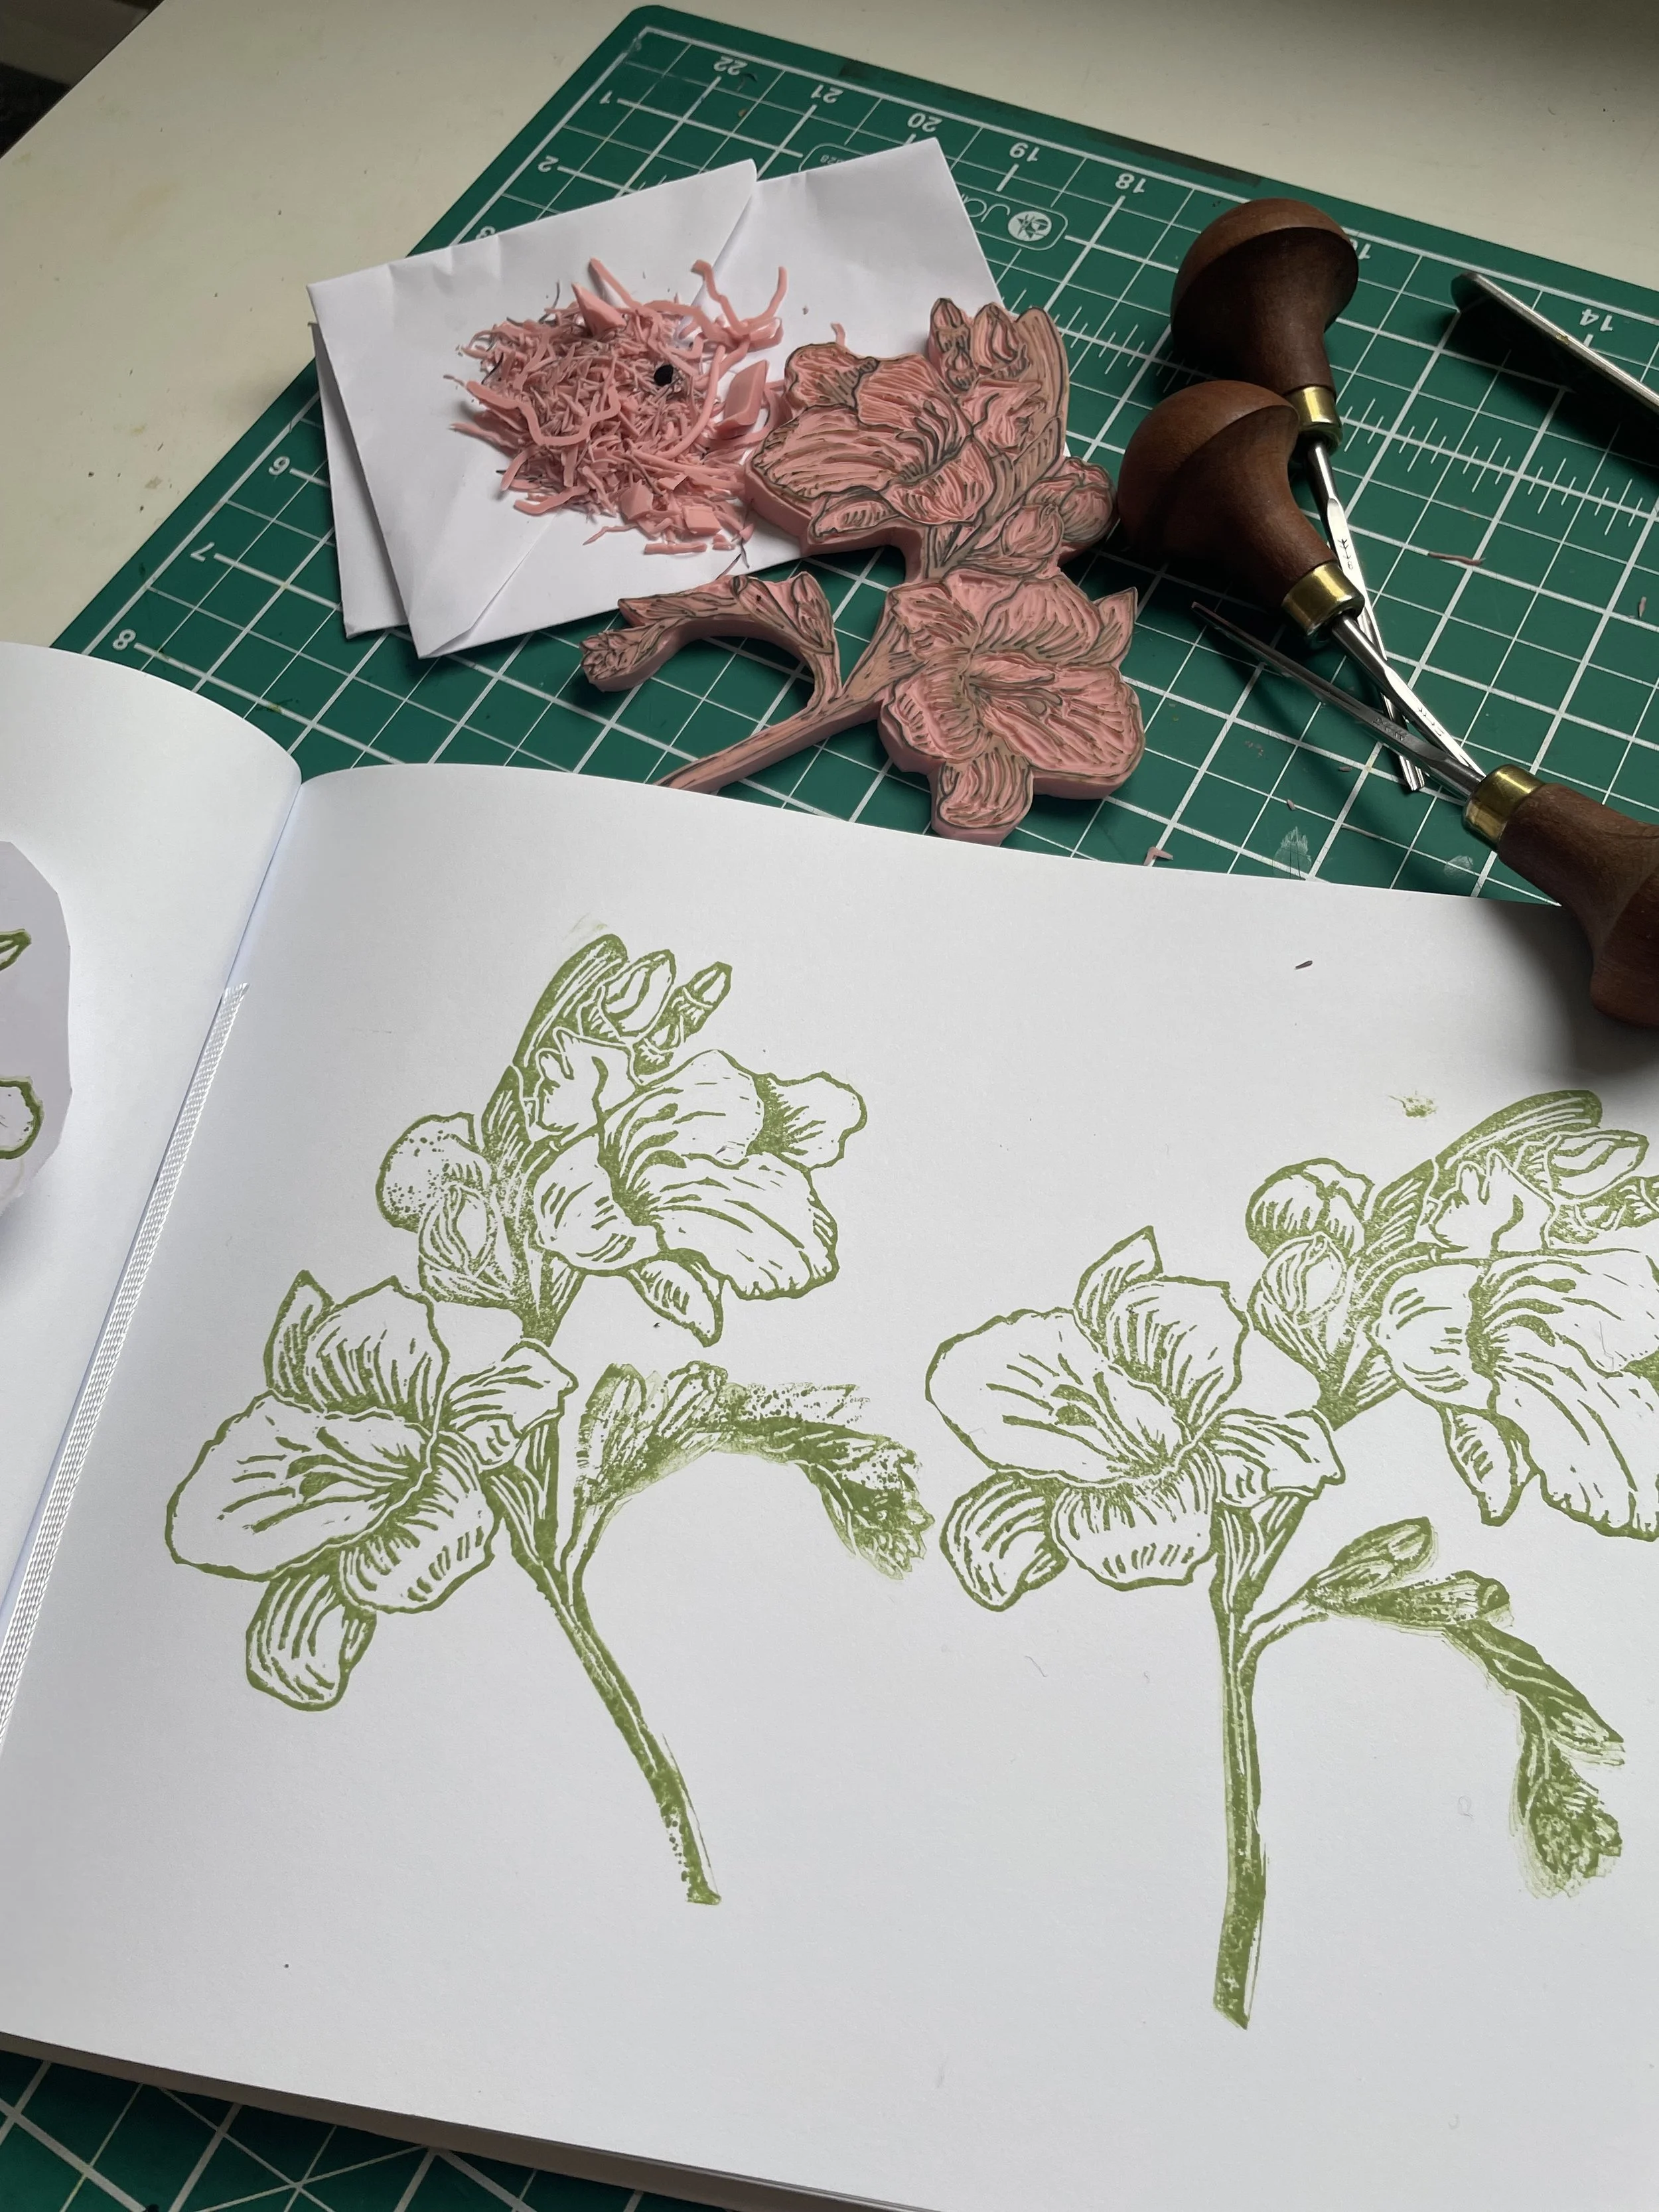
Keep doing test prints to track your progress and see how your block prints. You can use a stamp pad to simplify this process (Versa and Memento do great printing stamp pads) or roll out some ink and test as you go along.
Once you are happy with your block it’s time to prepare your ink.
Step 3
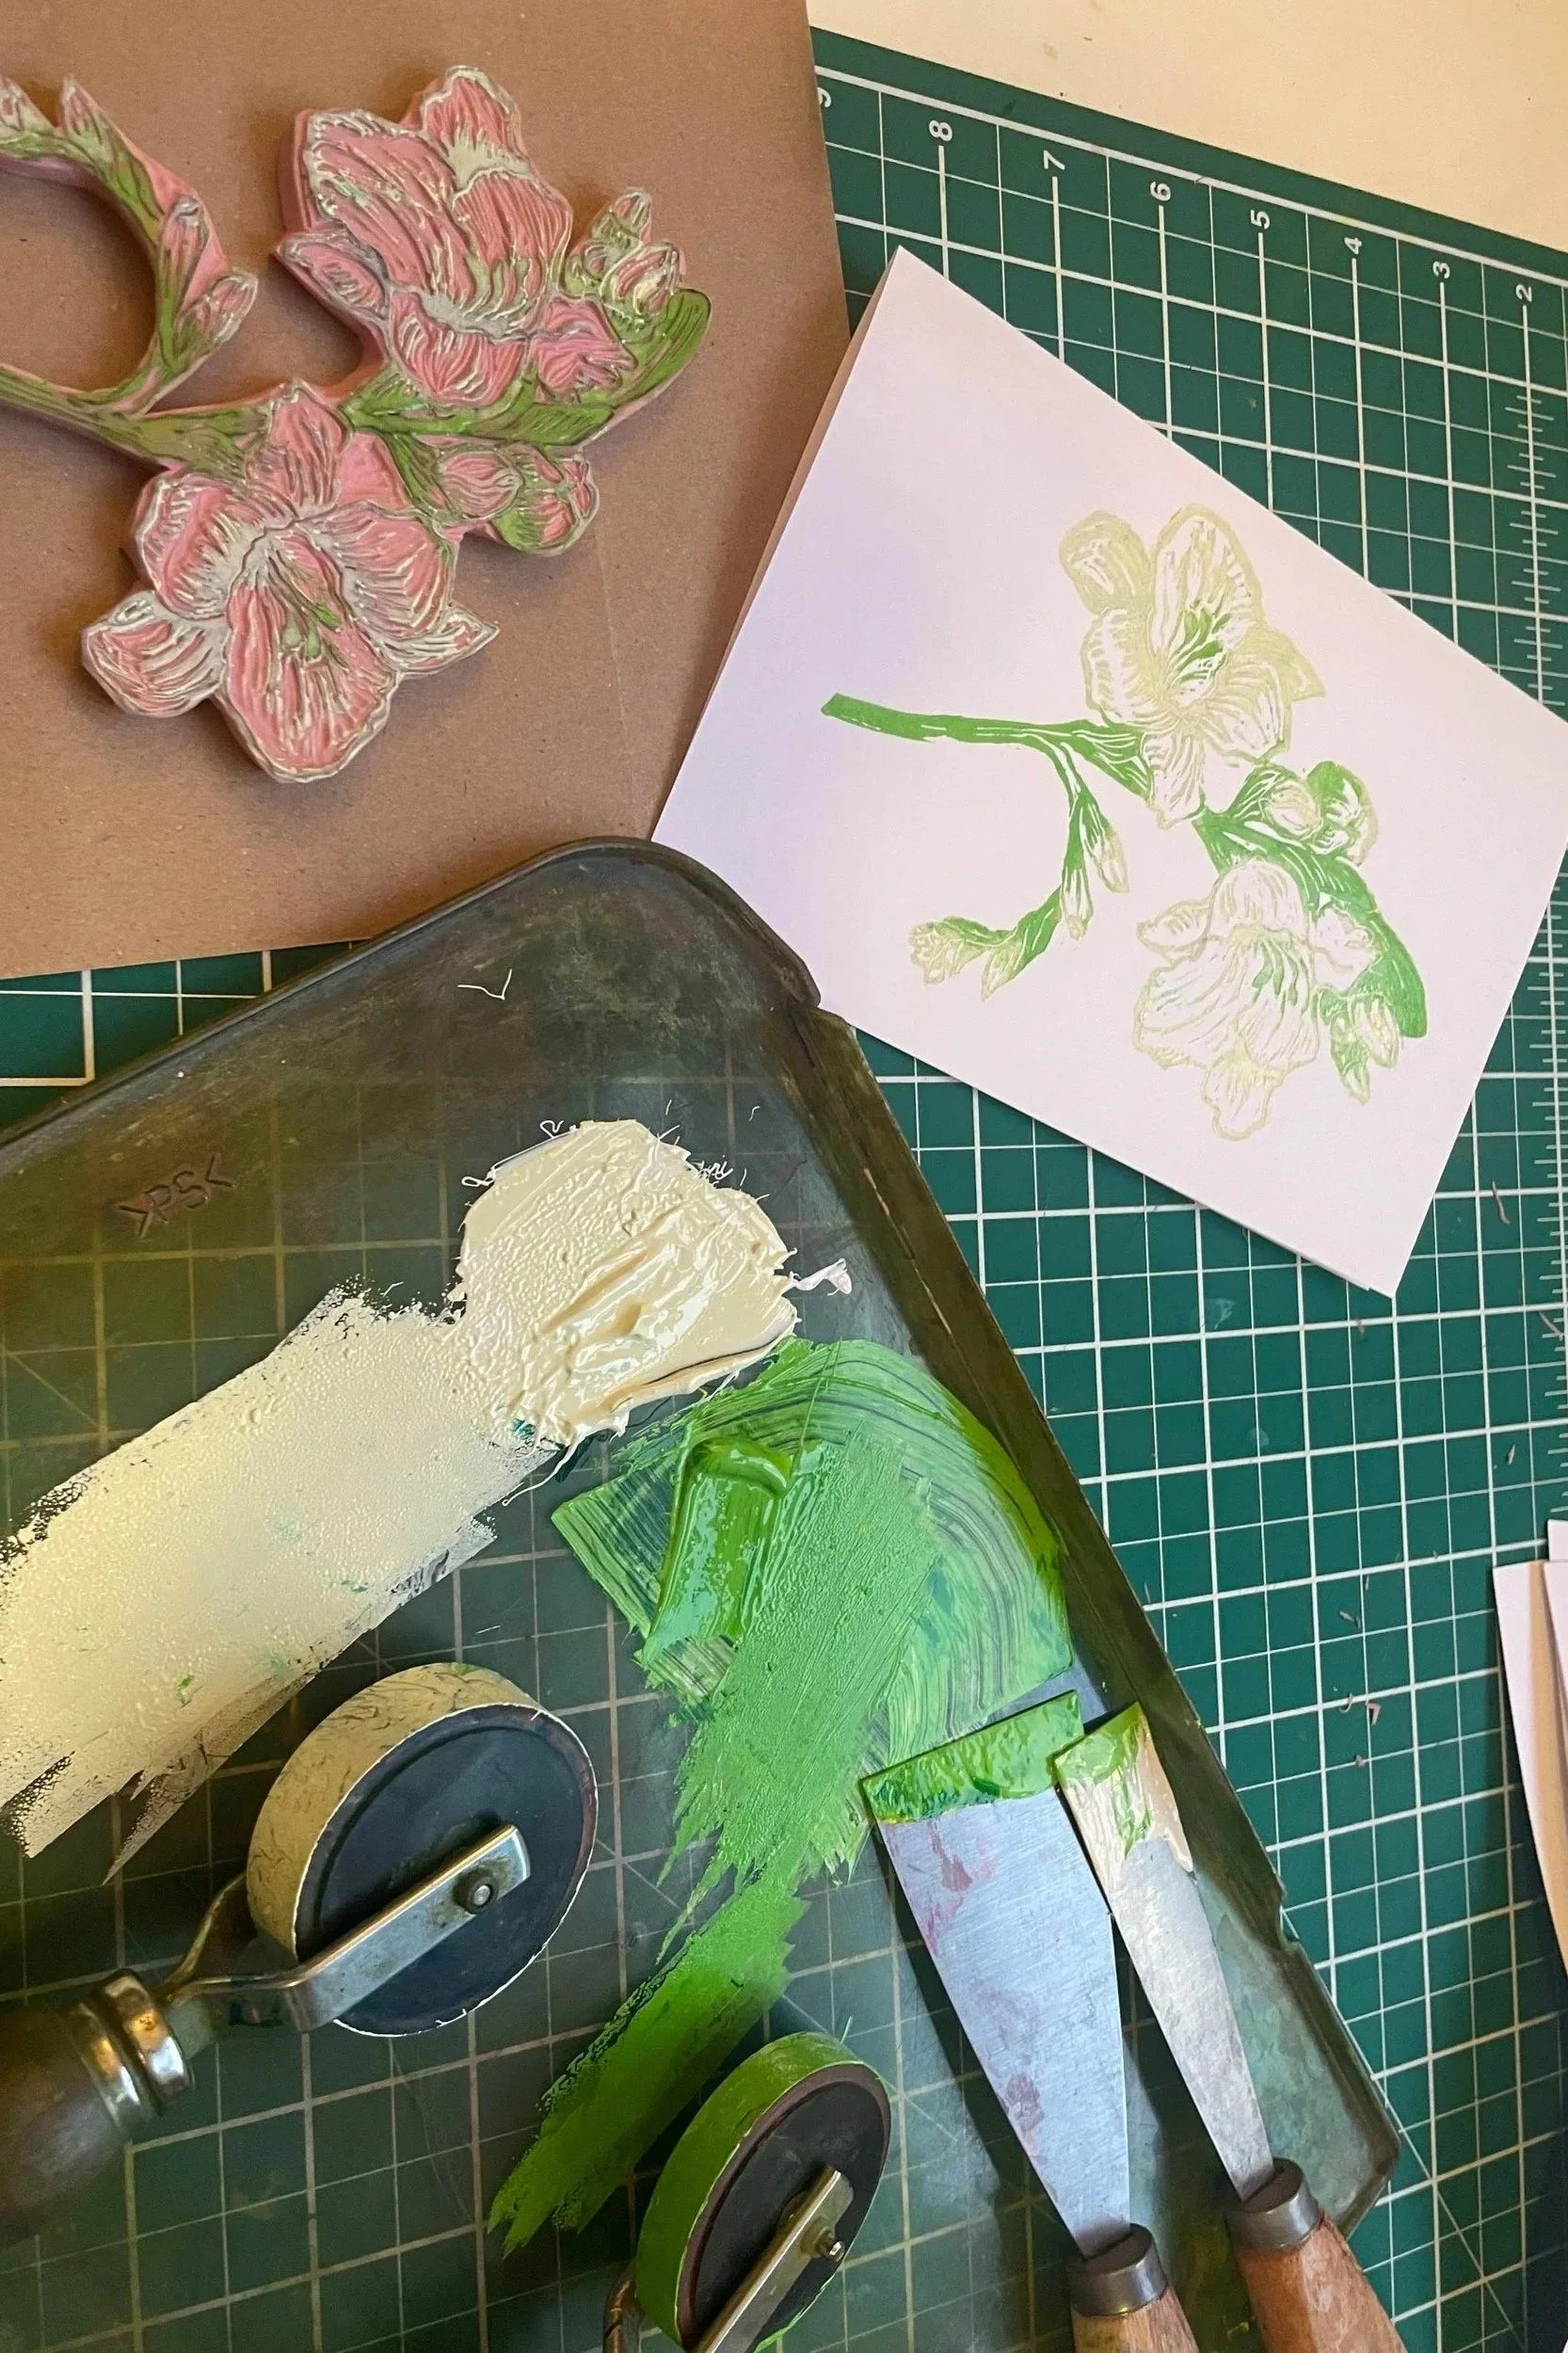
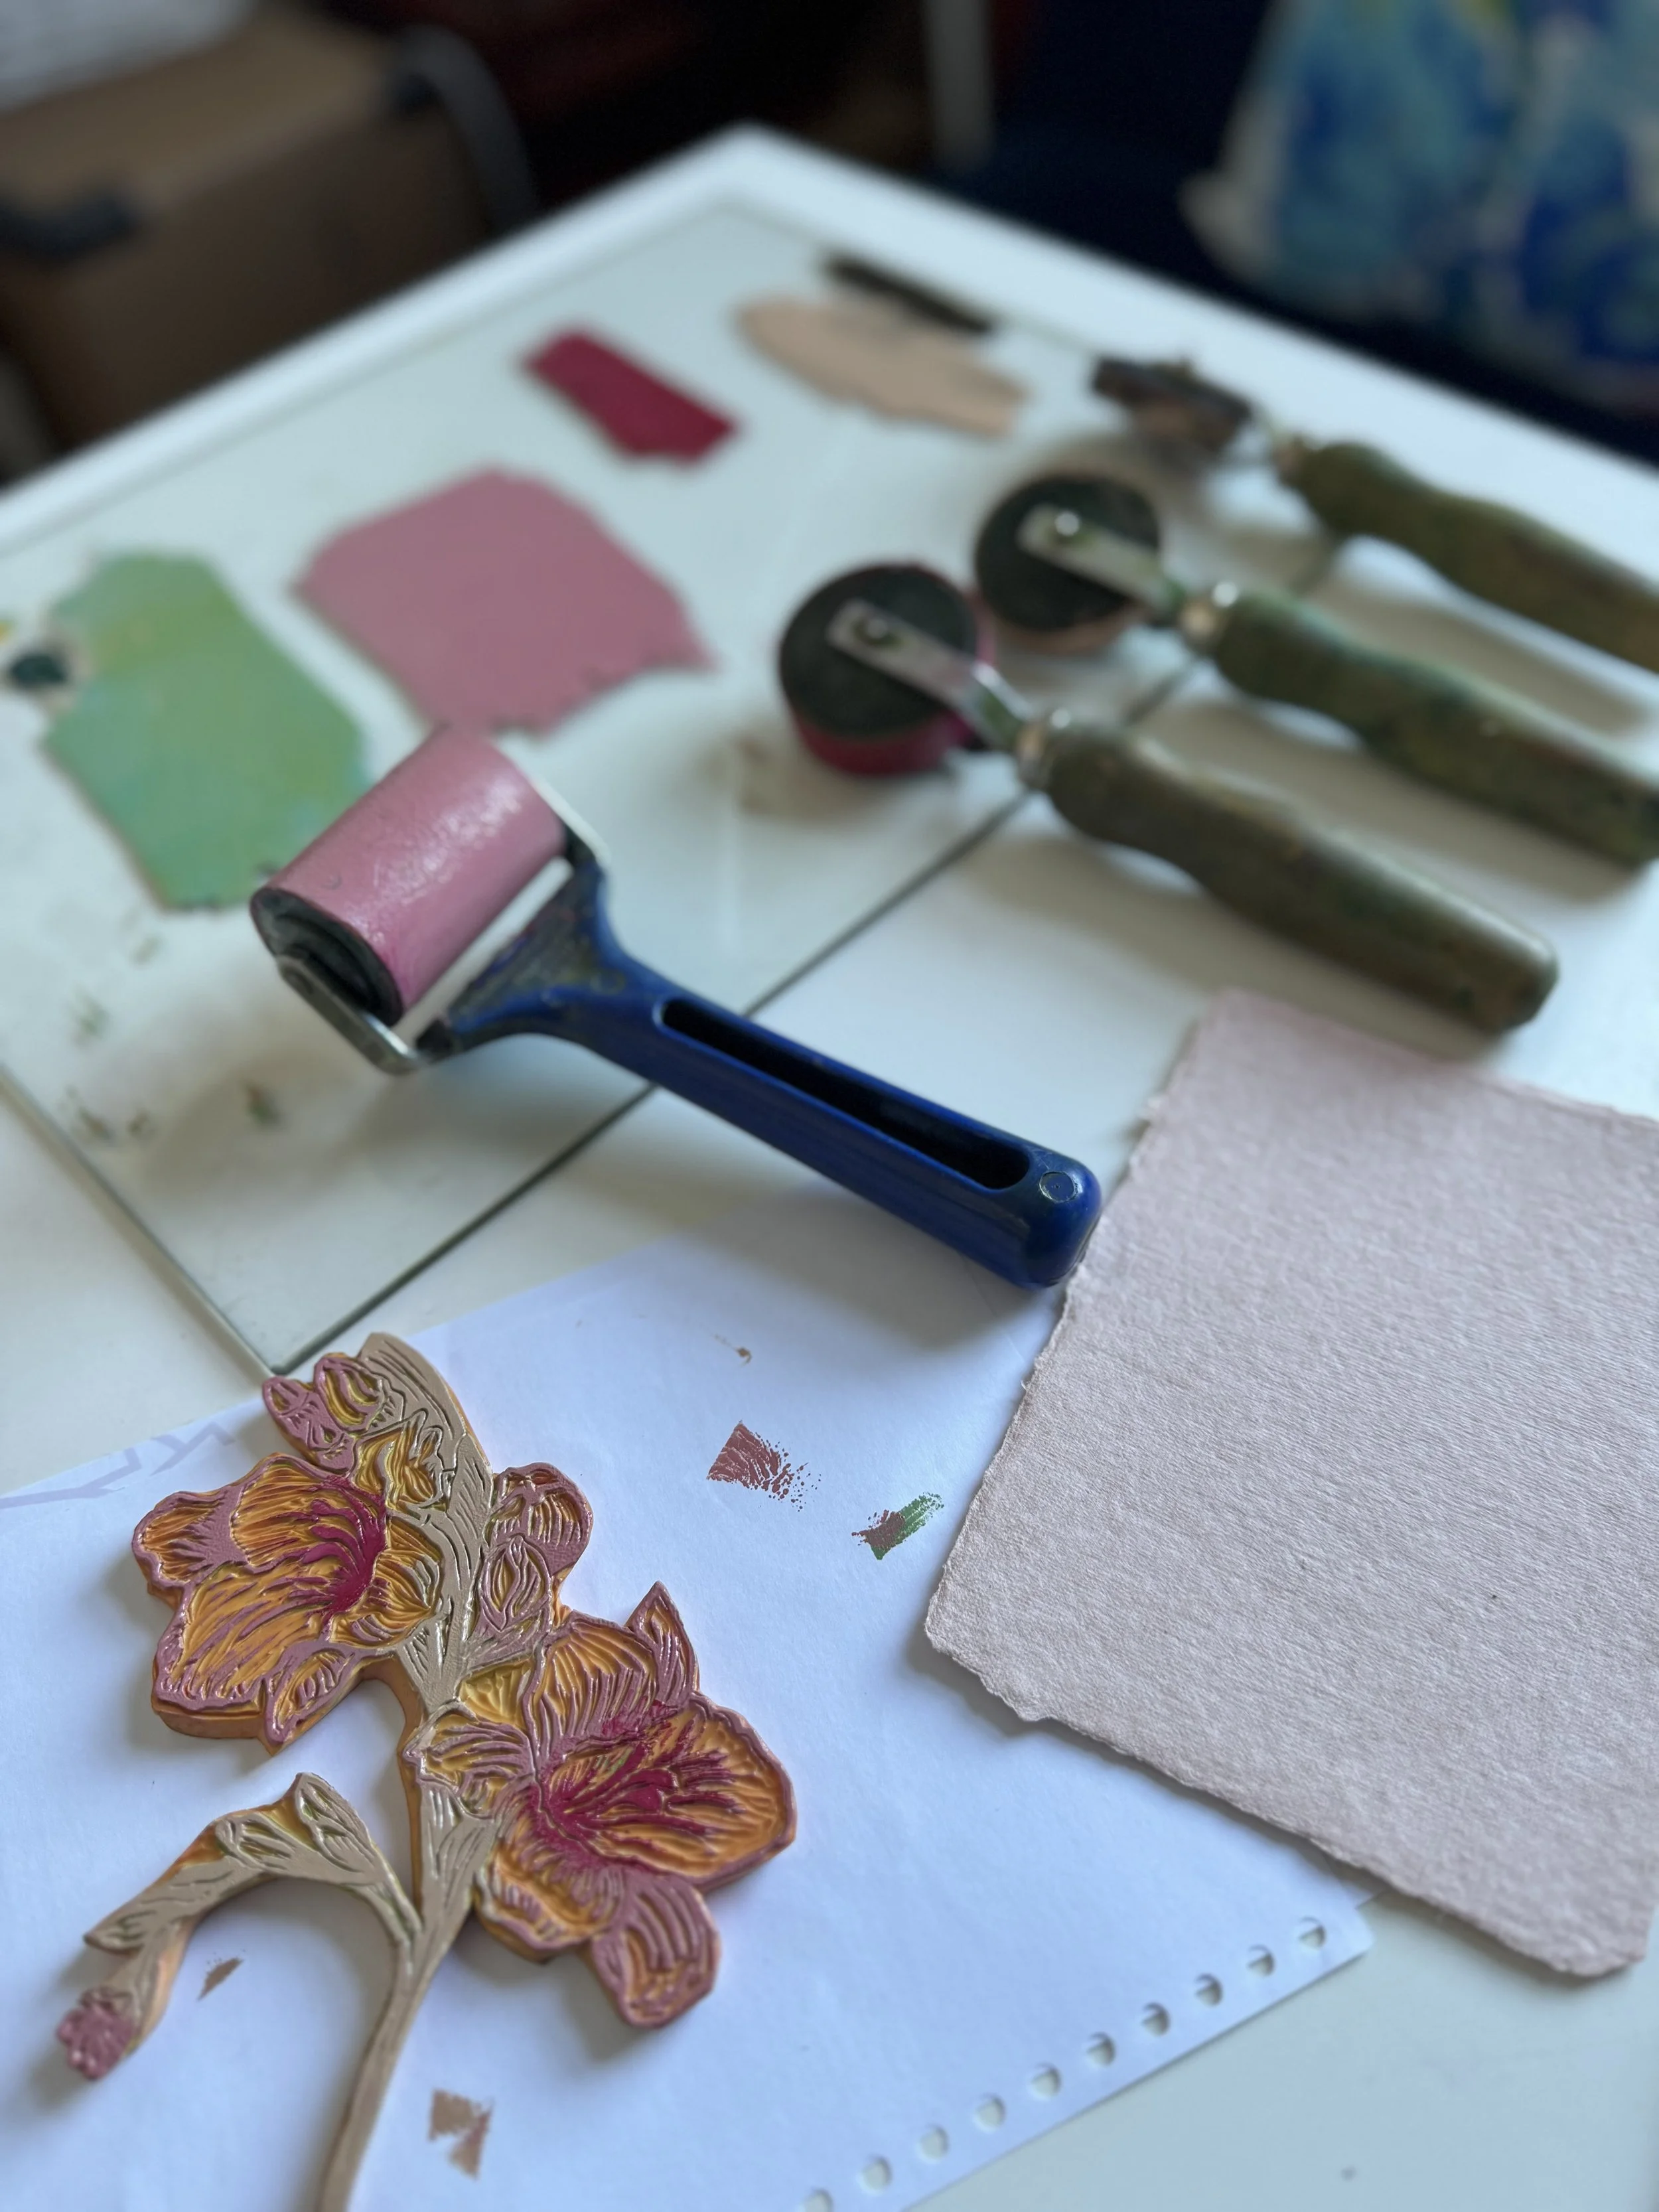
Roll out a small amount of ink onto your glass sheet or plastic tray and using your roller distribute the ink in a smooth even layer. You don’t want the ink too thick or too thin. I like mine to look like a satsuma skin peel.
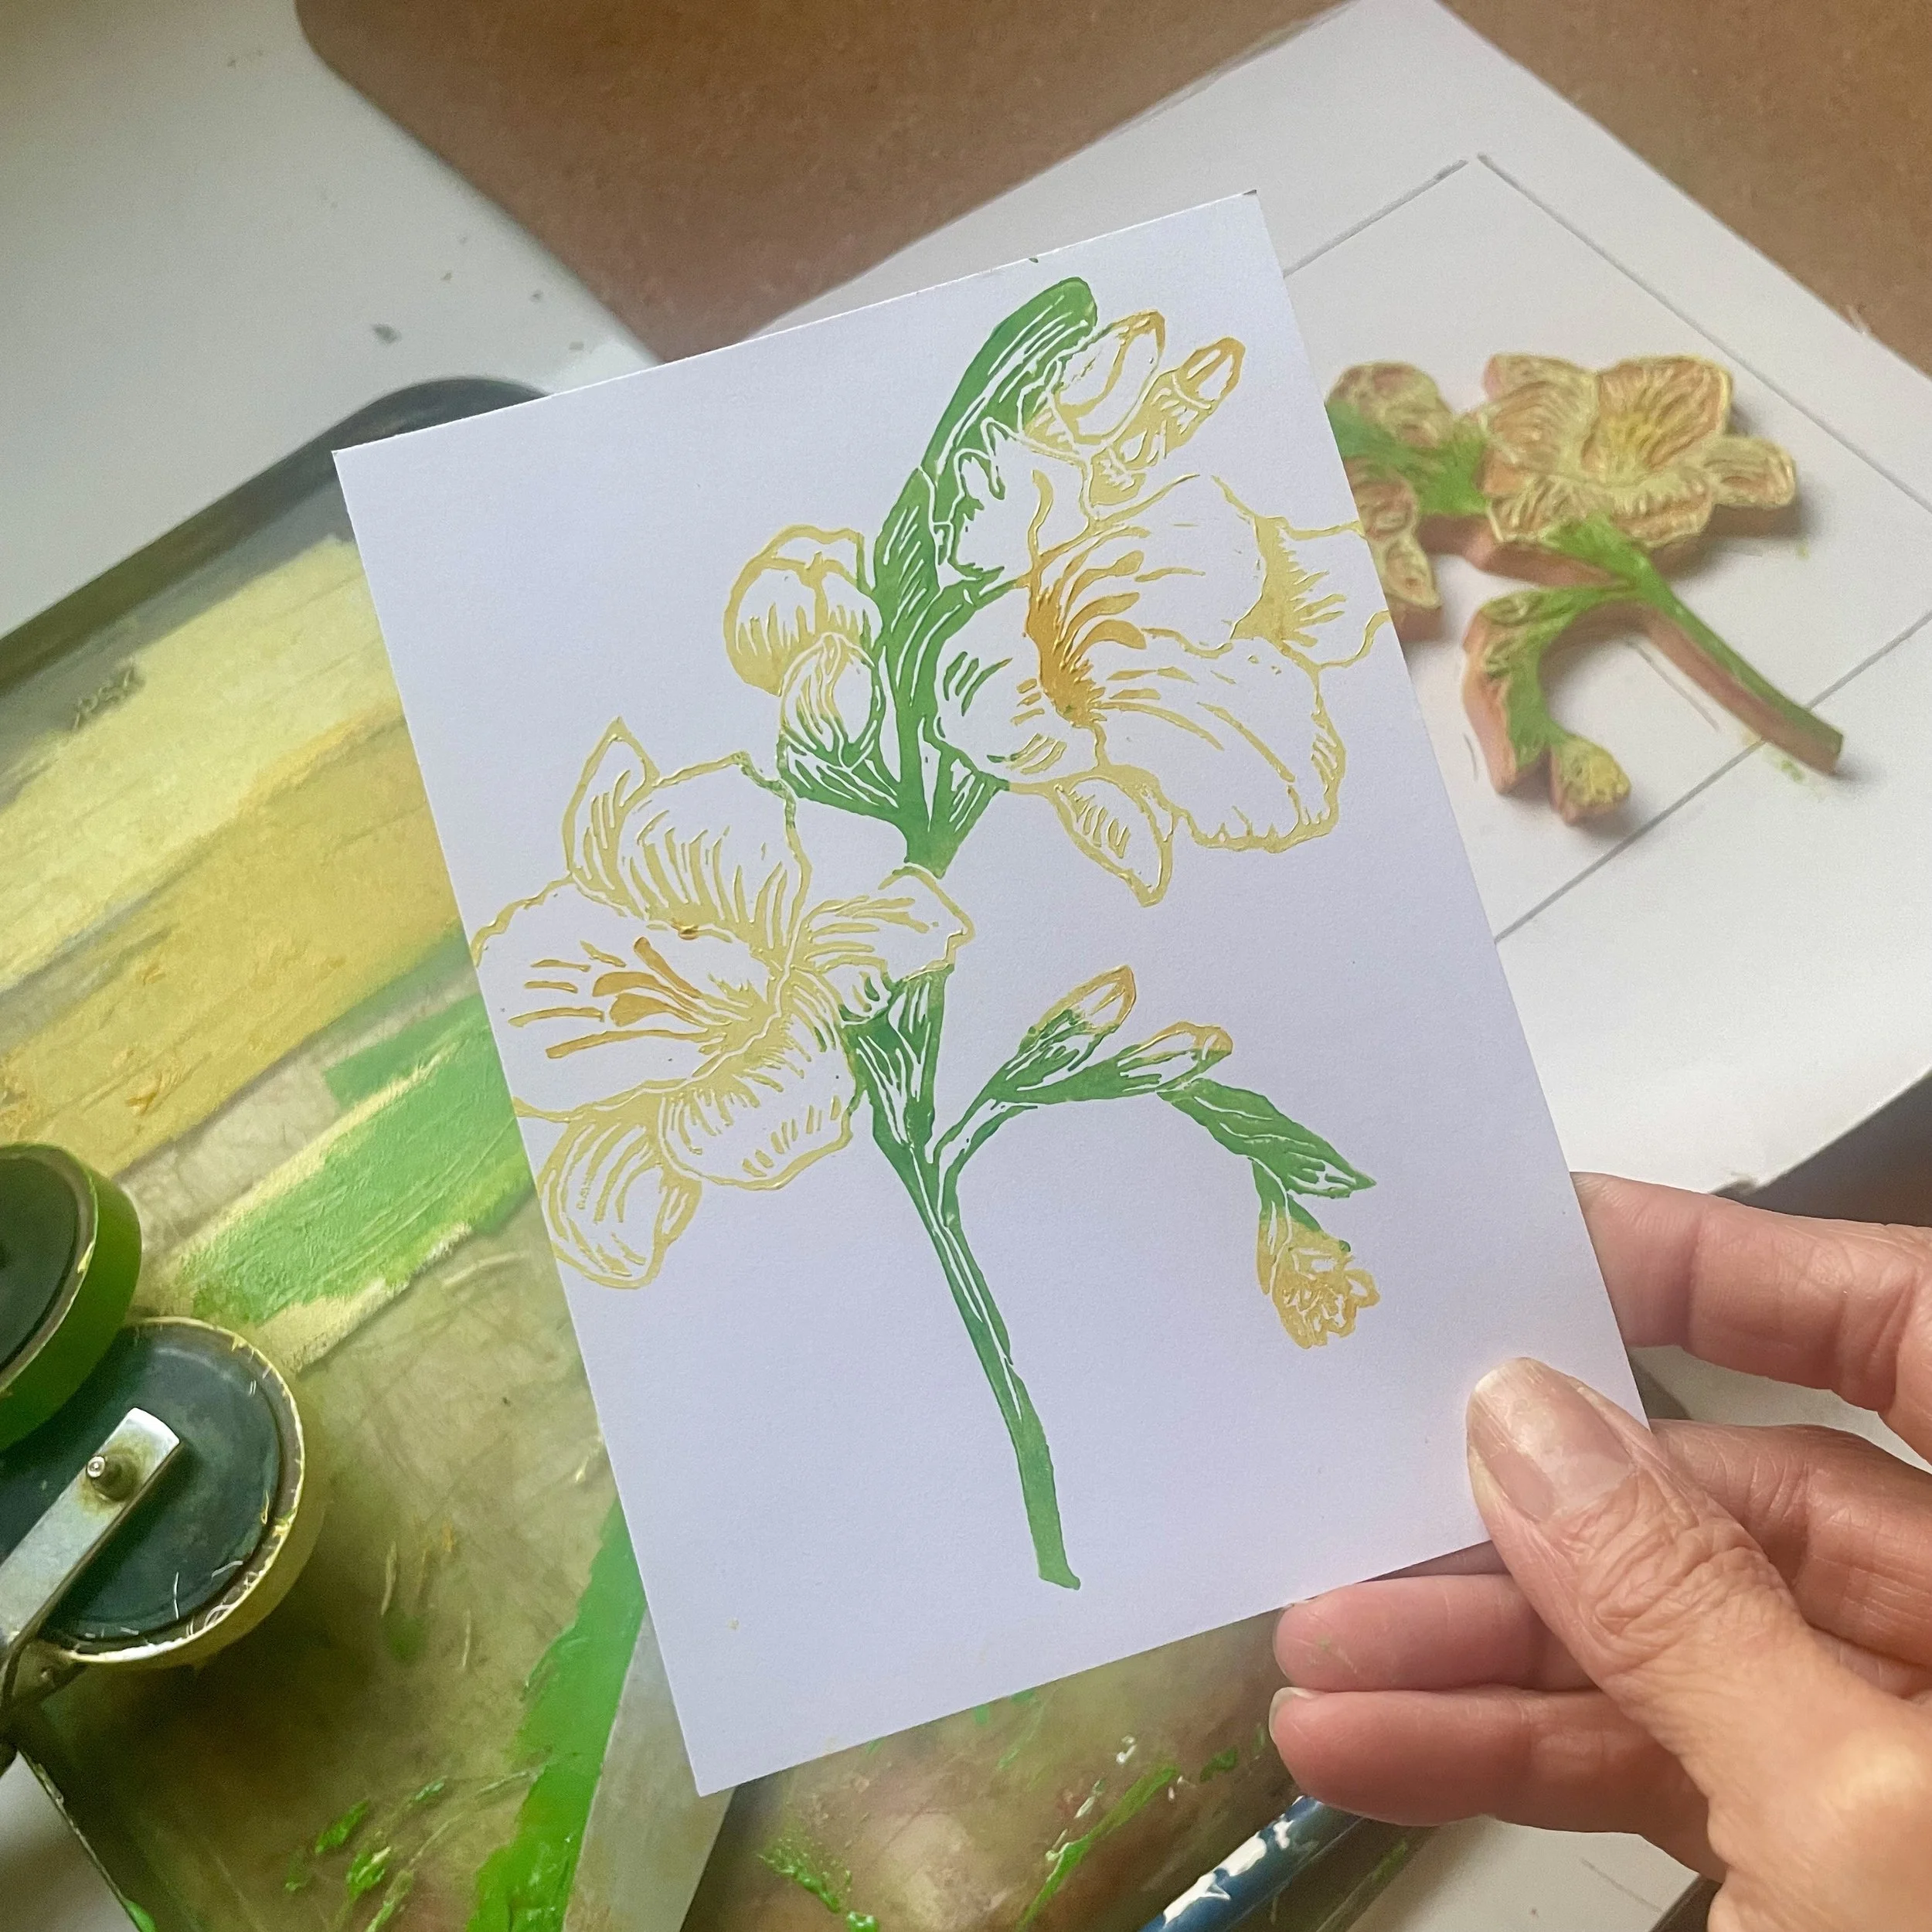
Now you can ink your block, in one or more colours in a smooth even layer.
Then place paper over your block and rub the back of your paper with your hand, a Baren or a wooden spoon. Check to see if you’re happy with the result. Leave your print to dry. Depending on your ink this can be a few days.
Step 4
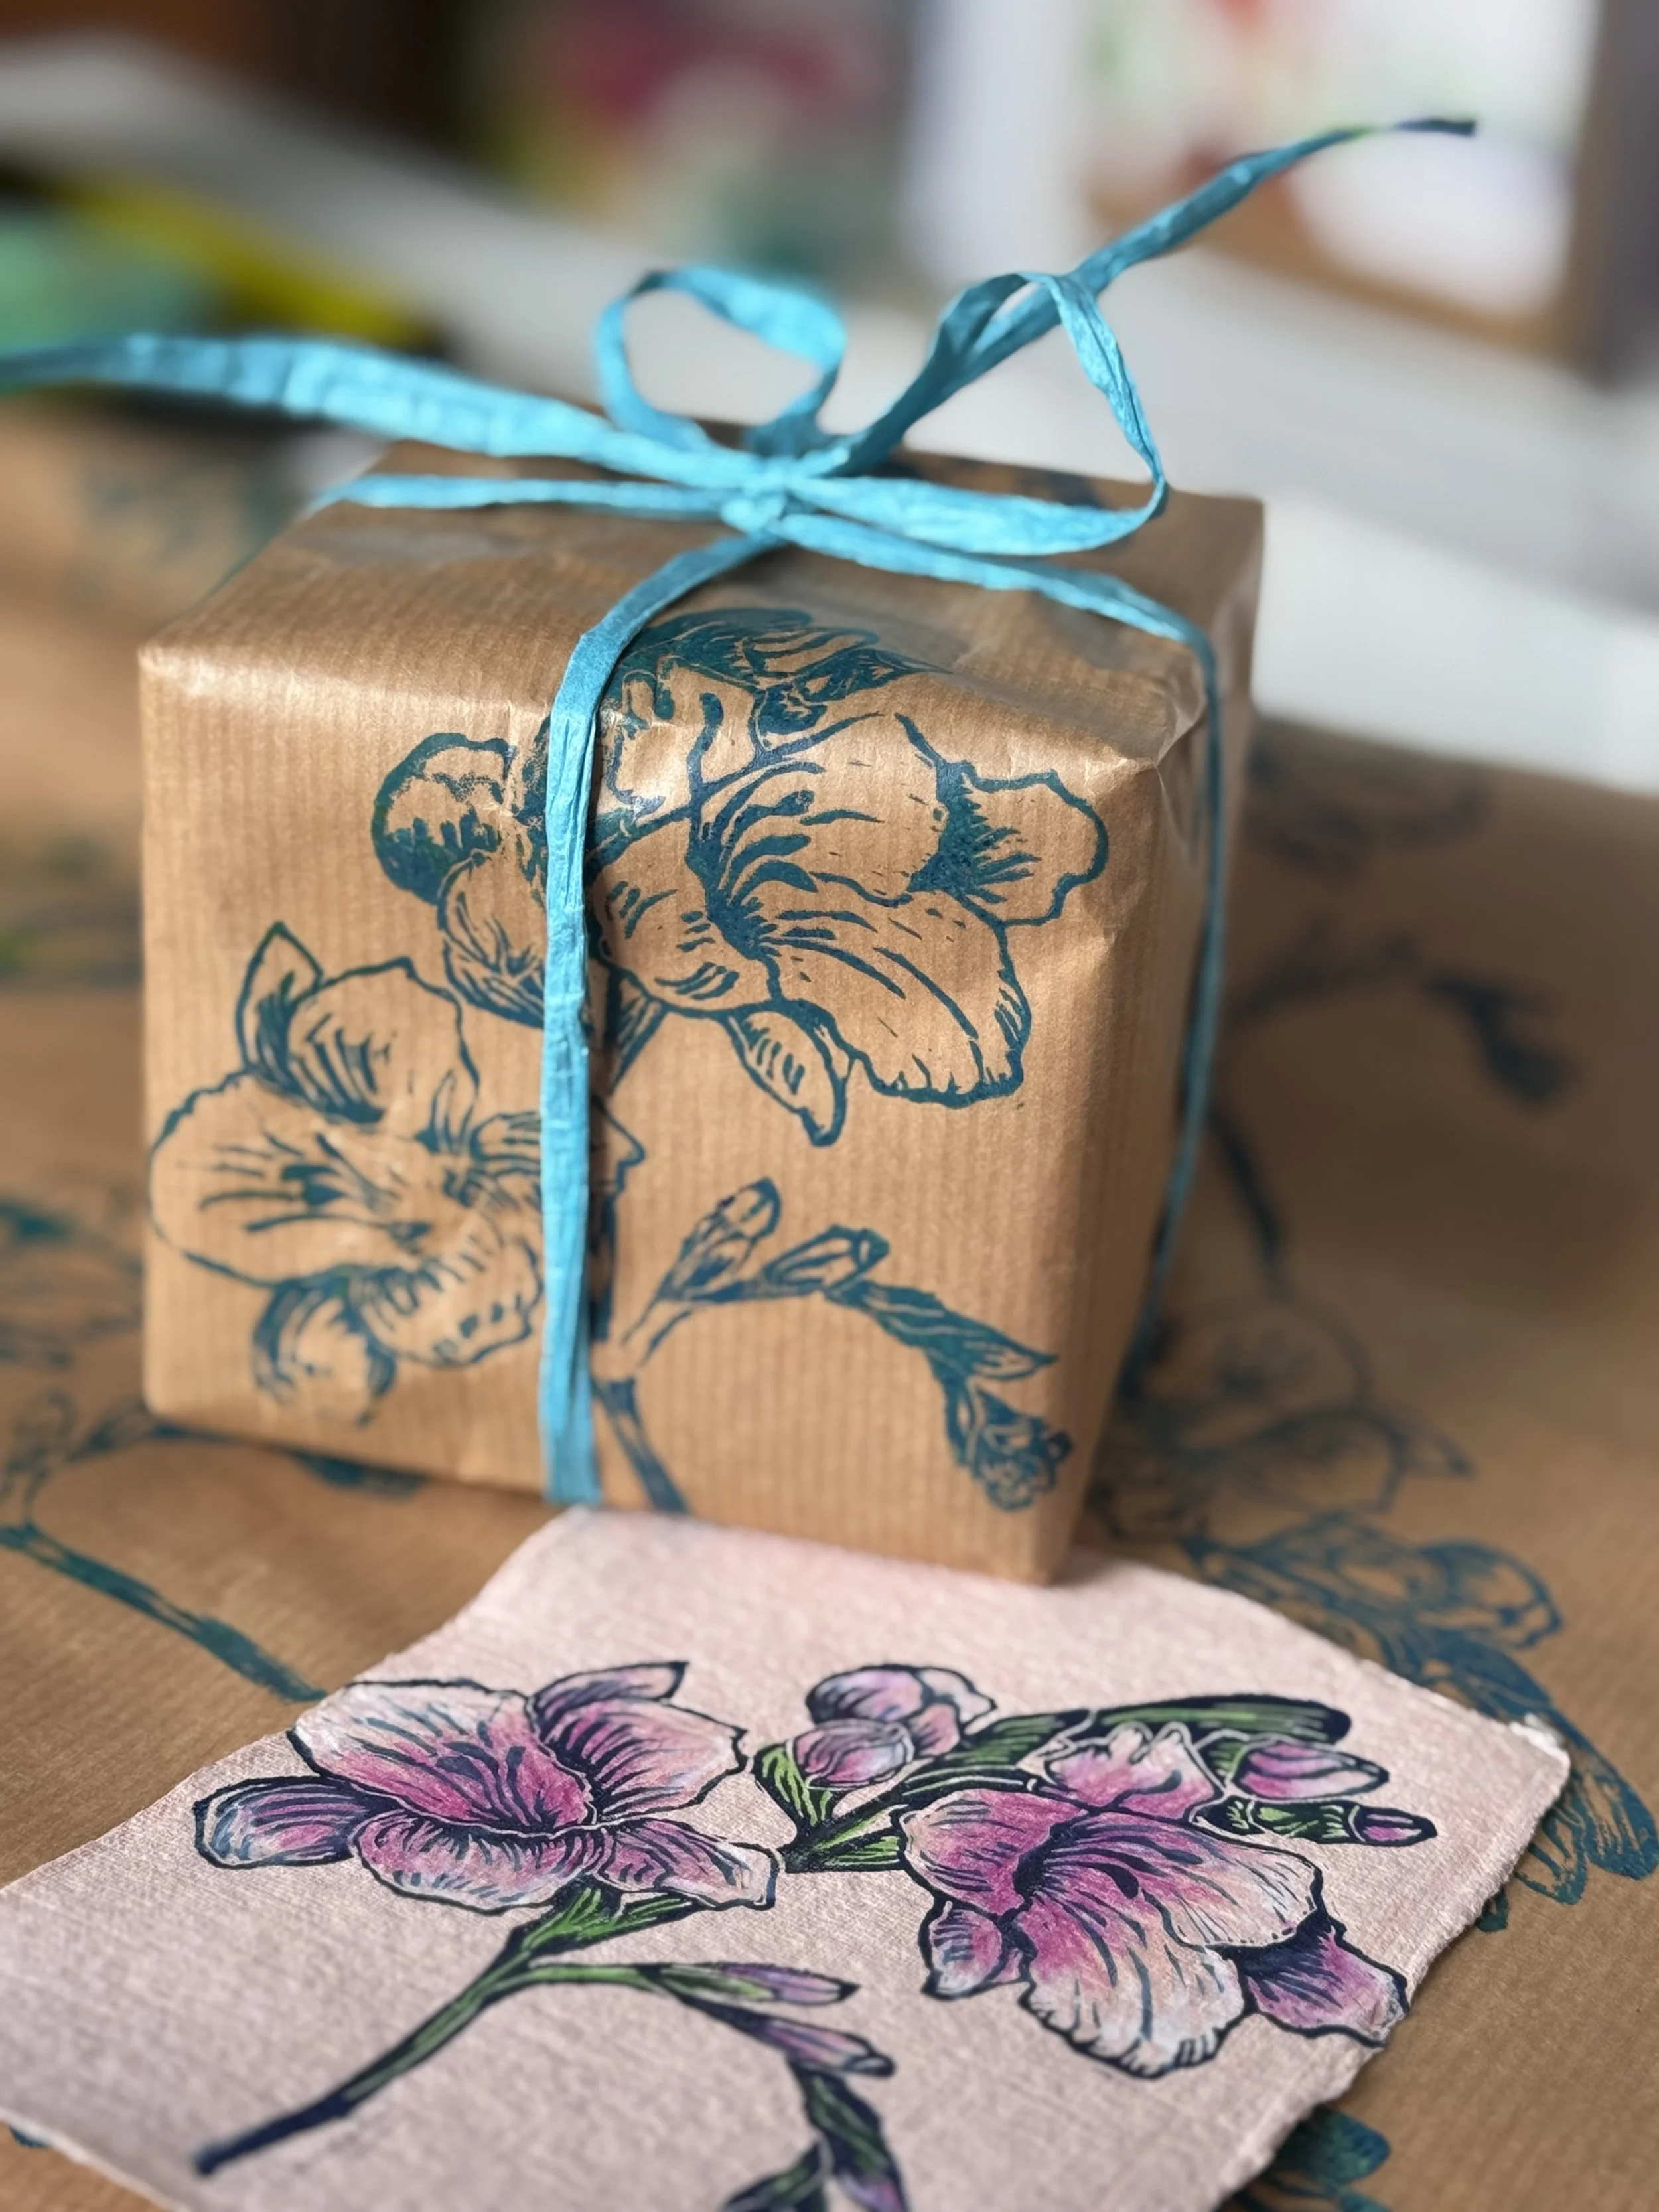
Do use your block to print in different colours, backgrounds, make cards or print on fabrics. It’s so much fun giving old clothes a new lease of life or making beautiful gifts for friends with your unique print.
Step 5
Cleaning up. I generally use old newspapers, papers and wipe away as much ink as possible from my rollers, trays and carving and then simply wash with dish washing liquid and water. Be sure to dry properly. For more stubborn staining you can use a bit of sunflower oil and a cloth and wipe away. I also use Zest-it (available on Handprinted) as an extra clean to remove all traces of ink.
Step 6
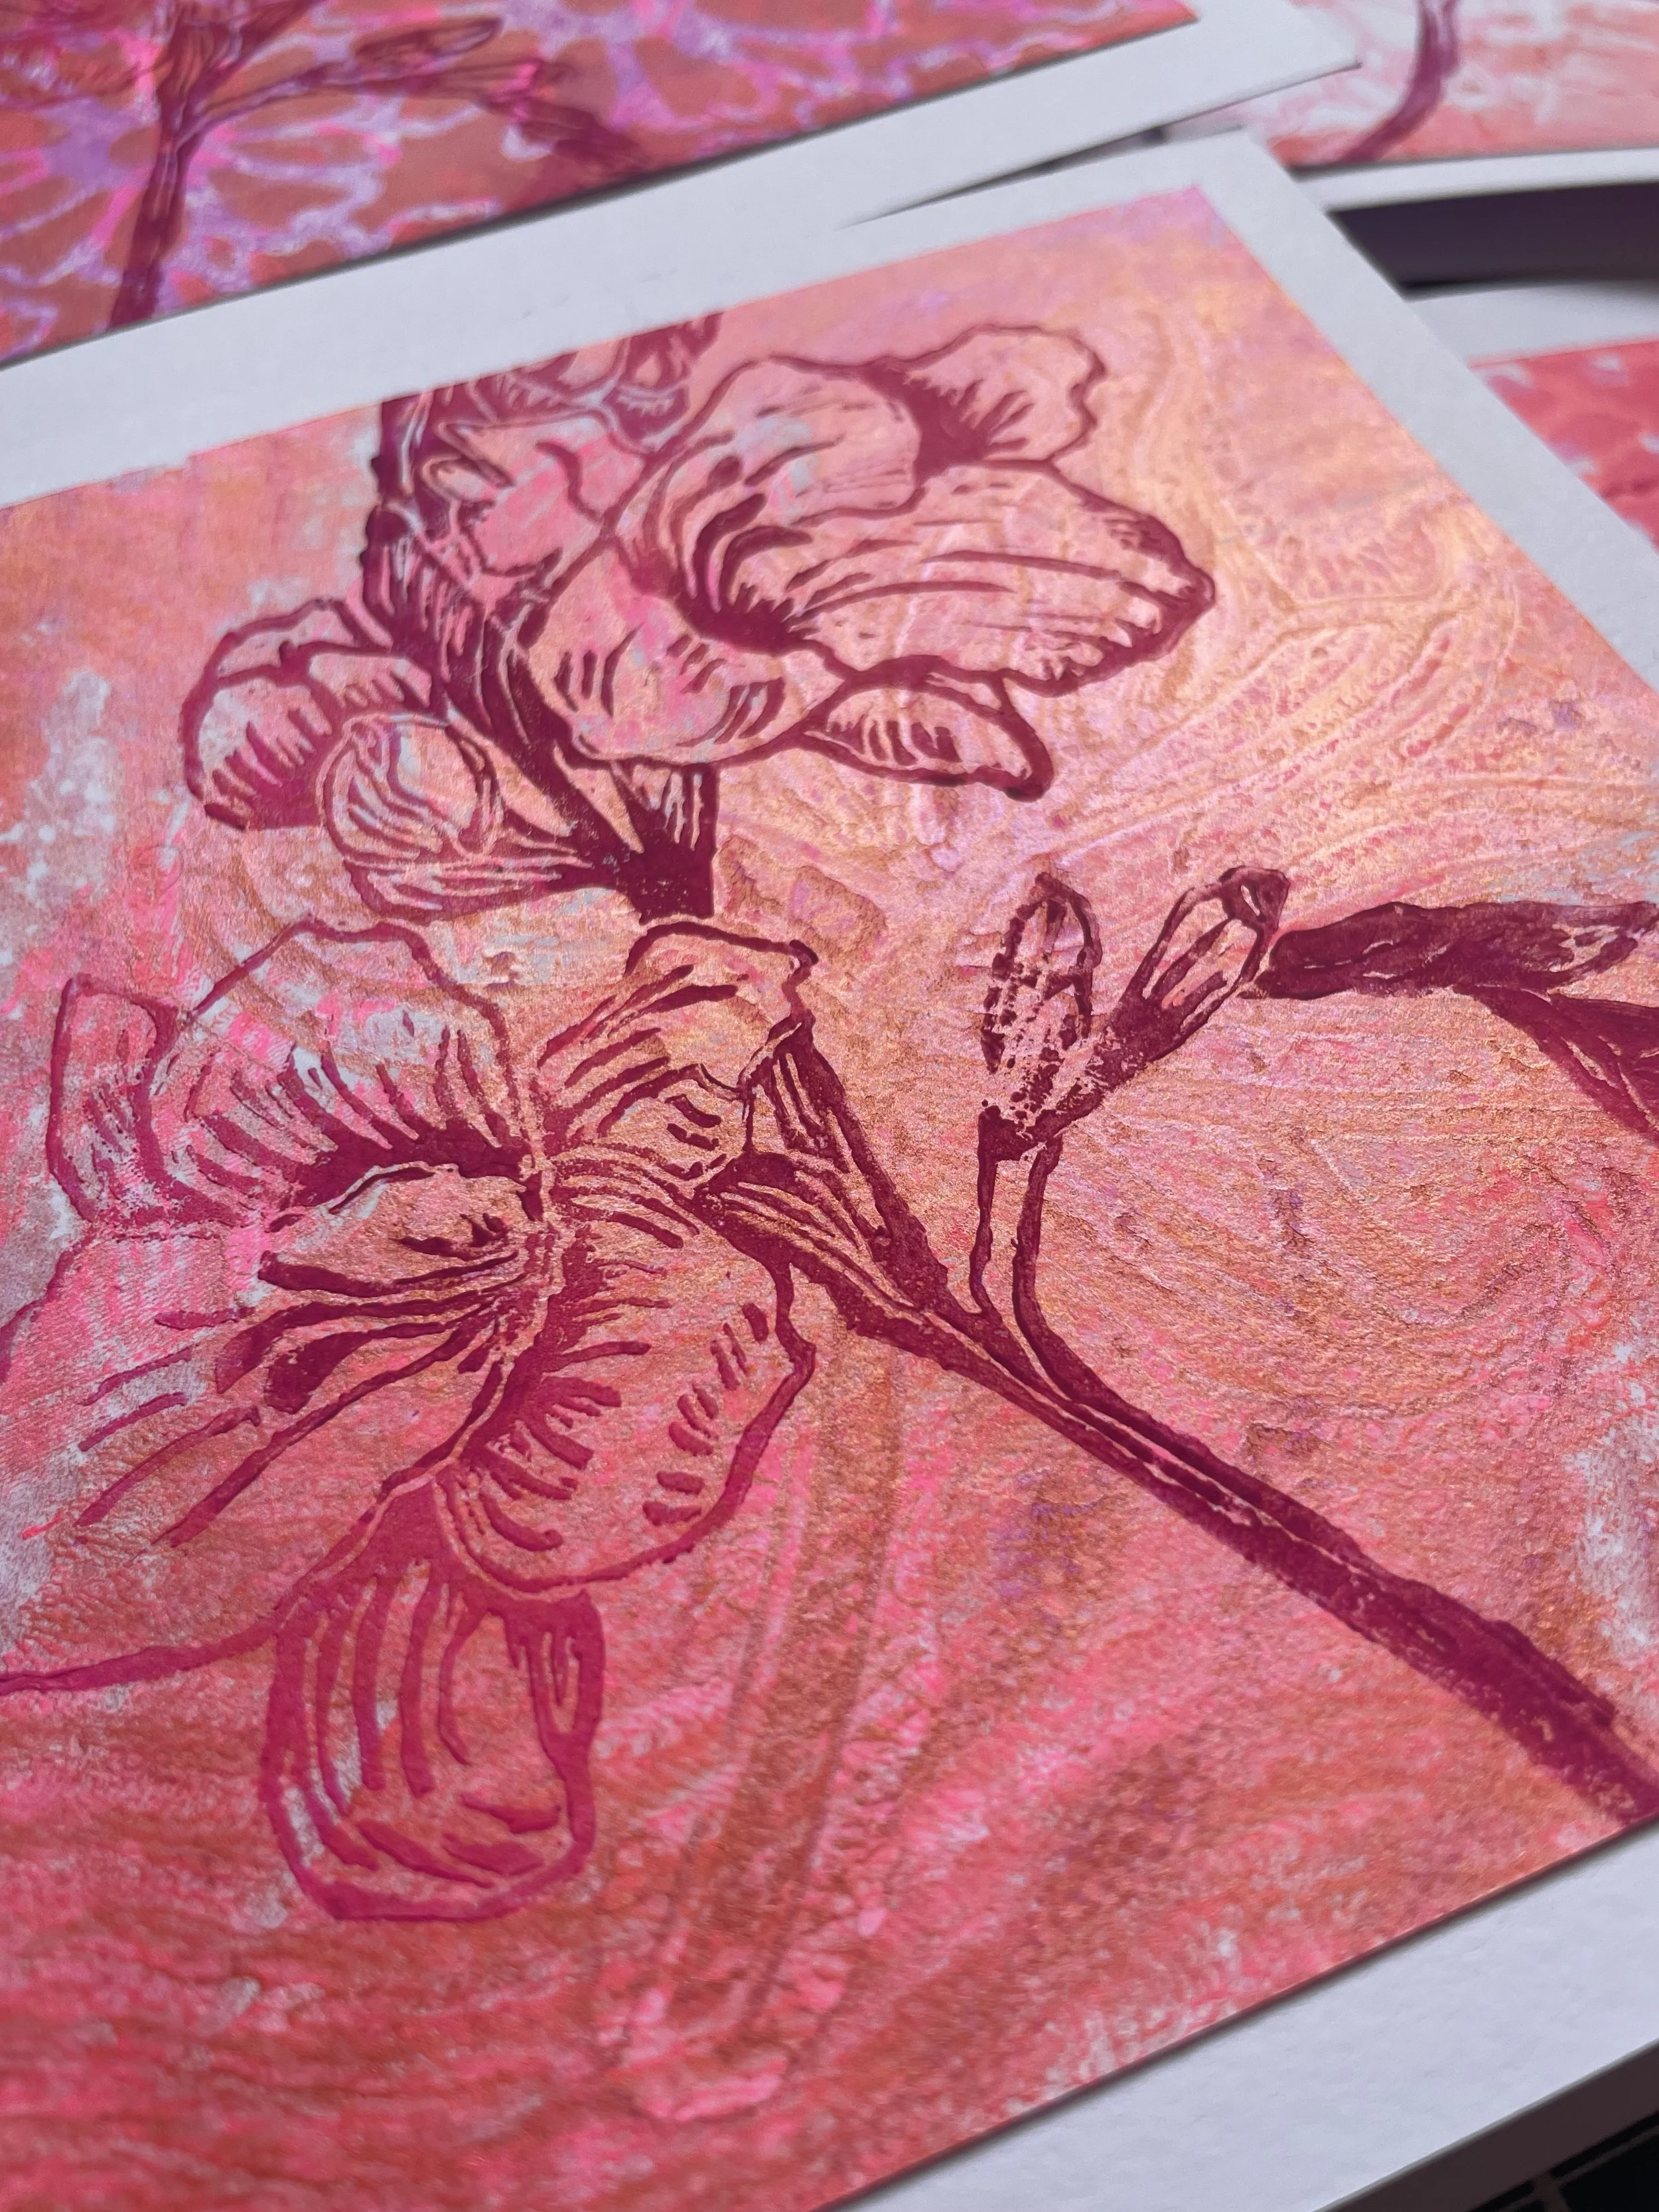
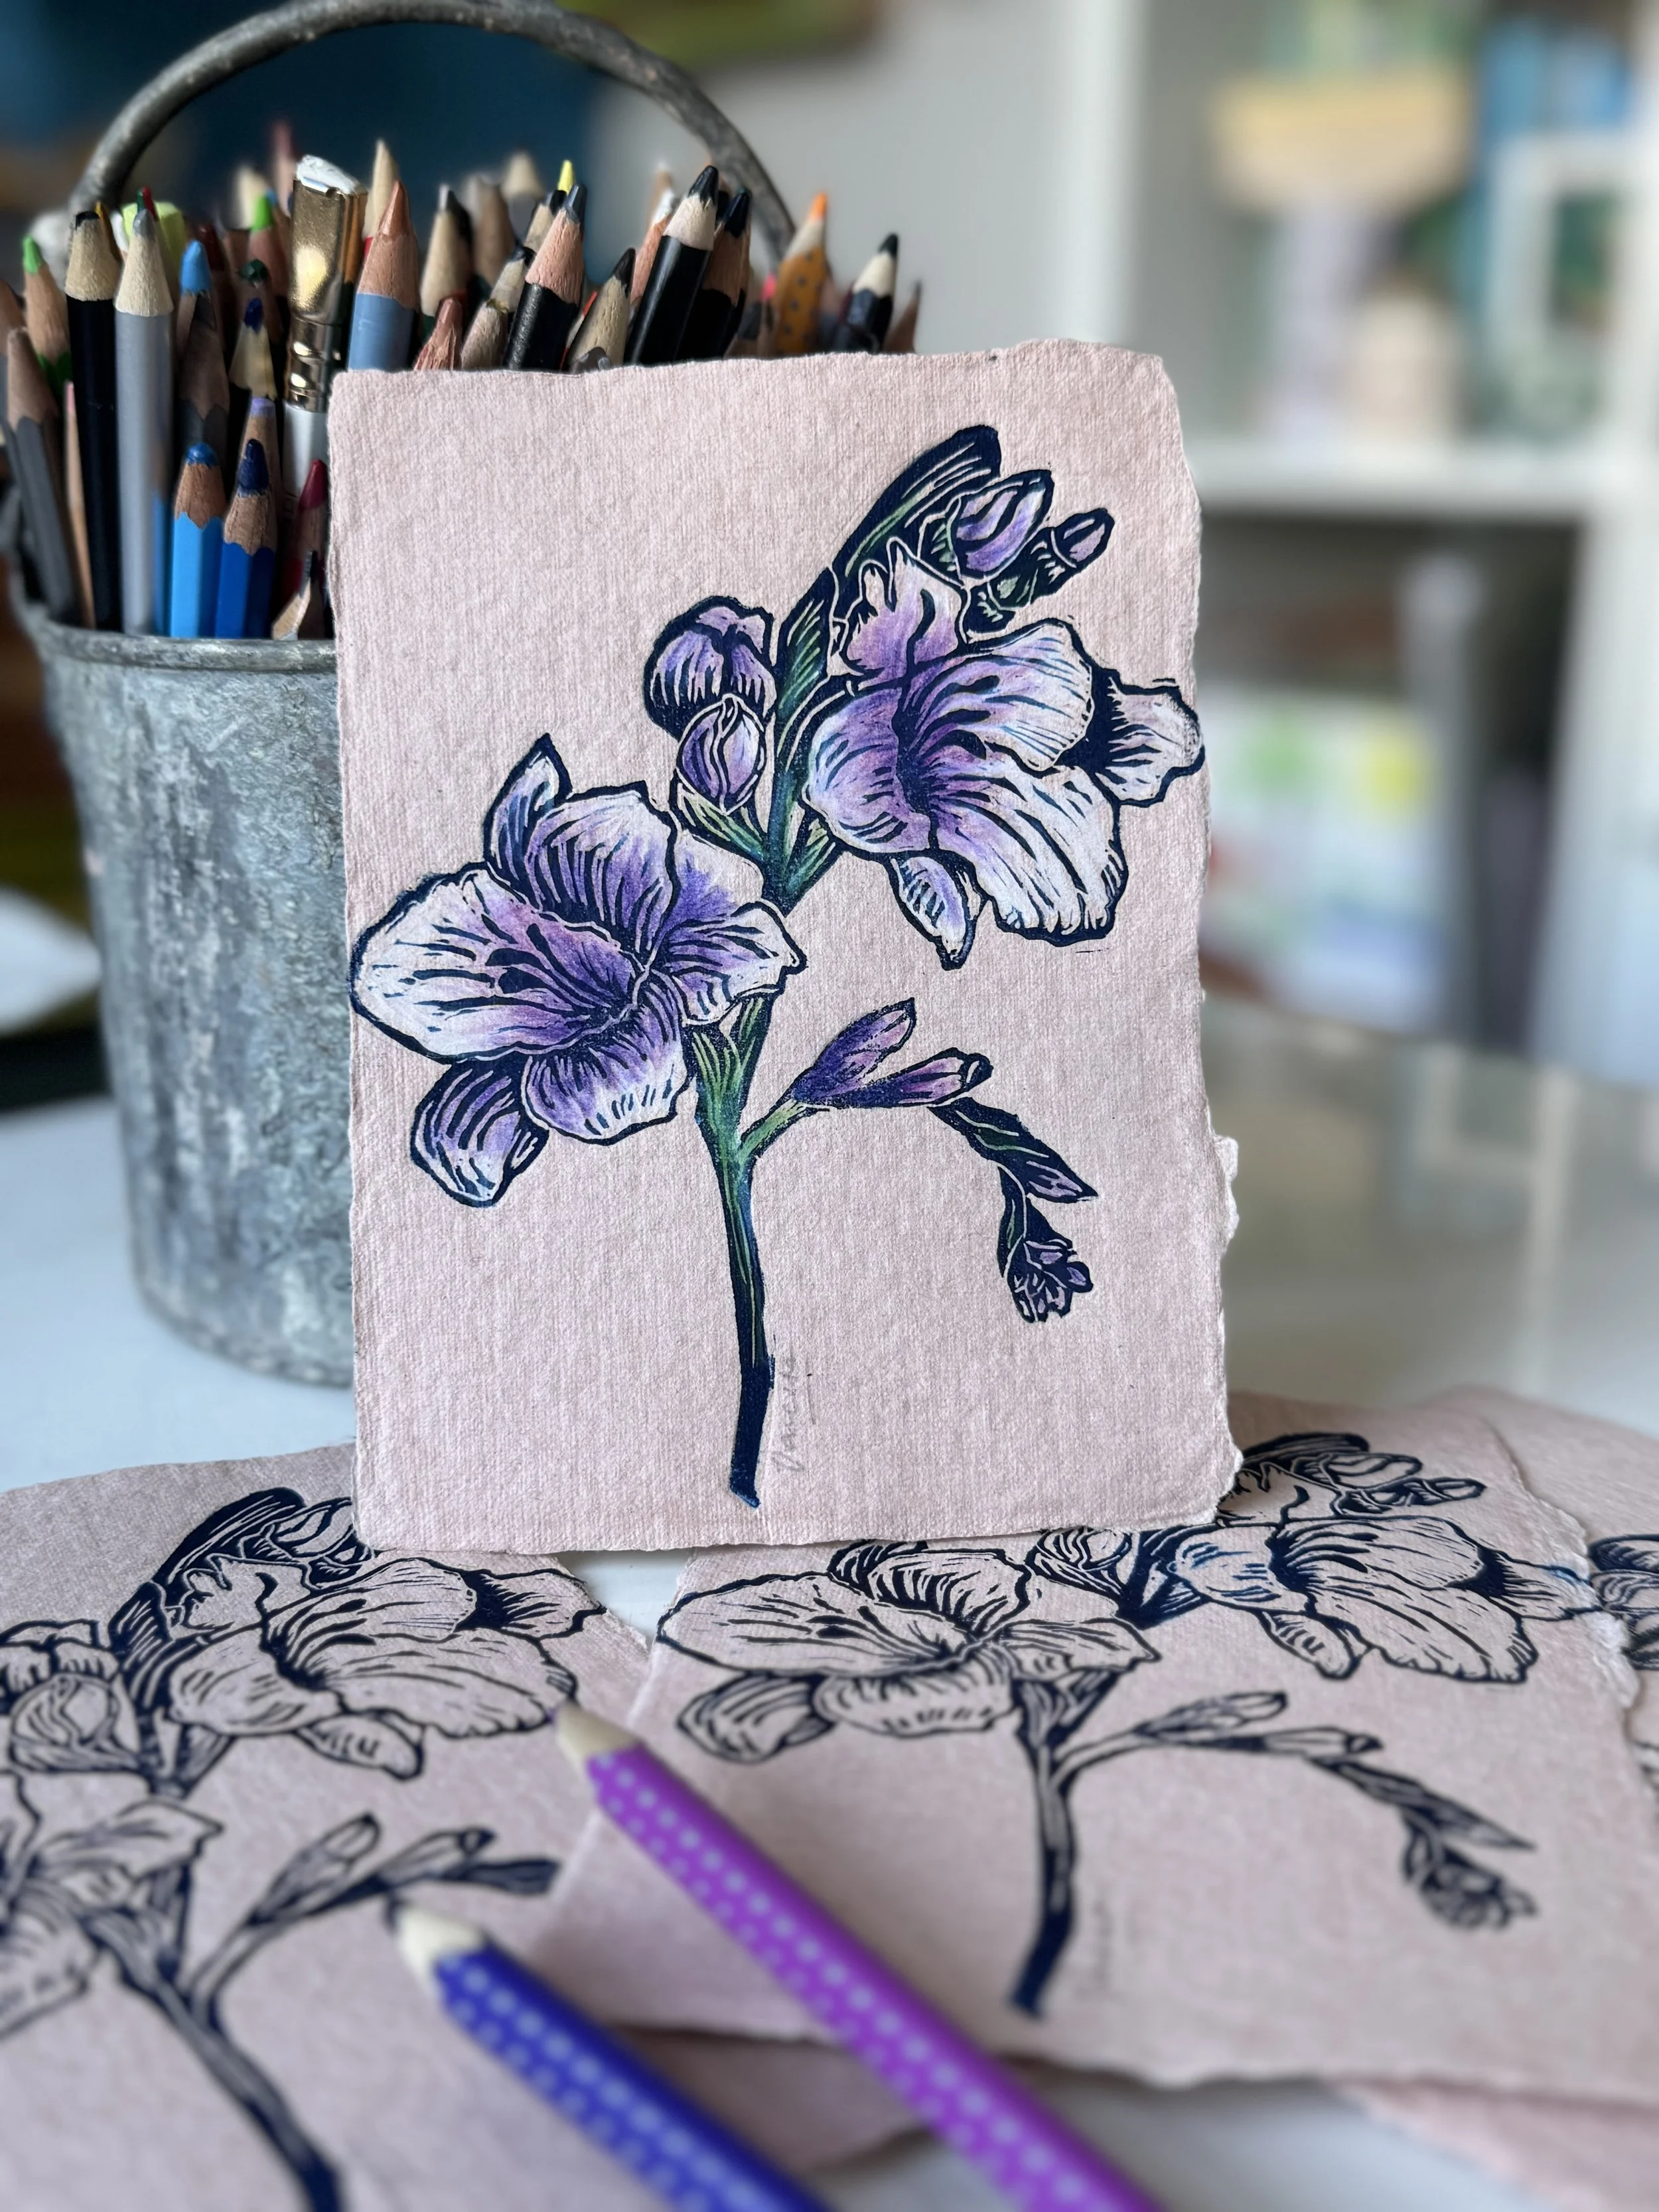
Be sure to experiment with printing your block in different colours, on different papers & fabrics, wrapping paper with glued papers below. You’ll be surprised at the results you can achieve.
All the photos on this page are the same block!
Materials that I use:
Cutting tools- During the workshop we used mainly a Lino cutter with changeable blades (the red ones) by Speedball or Essdee. My absolute favourite cutting tools are Pfeil (the wooden handle cutting tools)- I use a L110.5, L12/1 and L 9/2.
Lino surfaces- There’s quite a wide range of surfaces. Hand printed have a good selection. The ones we used in the workshop are called soft cut. They come in a range of colours.
Printing Inks- The printing inks we use in the workshop are by Essdee or Speedball. The fabric printing inks are also by Speedball. For my usual printing I am a fan of Cranfield Safe Wash Relief Inks. They wash away with soap and water and give a good quality finish. They are slow drying and need a few days to dry but are definitely worth the wait. If you want a quick drying printing inks then Speedball, Essdee and Schmincke are all decent. Speedball’s screen printing/fabric inks work well for fabric printing.
Rollers/ Brayer- A good basic roller can be bought fairly cheaply. I prefer a soft rubber one (rather than hard) for a more even coverage of ink. You need a more spongy roller for fabric printing or a sponge could work well. Essdee have a couple good options.
Baren- A disk shaped tool with a handle to apply pressure to the back of your block. To be honest I mainly use an old wooden spoon or my hands to rub the back of my prints otherwise you can get a decent one fairly reasonably on Handprinted.
Press- If you want to expand your printing work you could invest in a Wood Zilla press. They come in different sizes and different colours and are very easy to use and extremely hard wearing.
Glass/ perspex/ plastic plate or tray- You need a flat surface to roll your ink smoothly. Any smooth flat surface will do. A good option is to buy an old frame from a charity shop. The glass works really well as a printing tray.
Paper/ card- Hand printing requires a smooth printing surface. For hand printing I wouldn’t go any thicker than 250 gsm. Ho Sho is a paper I love and a thicker one I use a lot is Somerset.
Other bits- Newspaper/ magazines, Cardboard, Masking tape, Tracing paper/ carbon paper, Old rags, Cutting mat, Scalpel.
Suppliers I use:
handprinted.co.uk This is my main supplier. There are videos and tutorials on their blog, and on their website which are excellent and a great way to further your skills. They stock fabric printing inks and supplies too. Just be sure to buy from the RELIEF PRINTING section.
intaglioprintmaker.com Good selection of printmaking equipment. They have a shop near Southwark bridge if you prefer to buy stuff in person.
lawrence.co.uk I also use Lawrence art supplies quite a lot as they have a good printmaking selection.
jacksonsart.com Great choice of art and printmaking supplies.
cassart.co.uk Not a wide choice of printmaking supplies but good choice of papers.